In addition to the gear you'd find at a ski resort, backcountry skiing requires a variety of other equipment.
Entering ungroomed snowy mountains means climbing in addition to skiing, so regardless of the time or location, gear like that of a light winter mountain climber is essential.
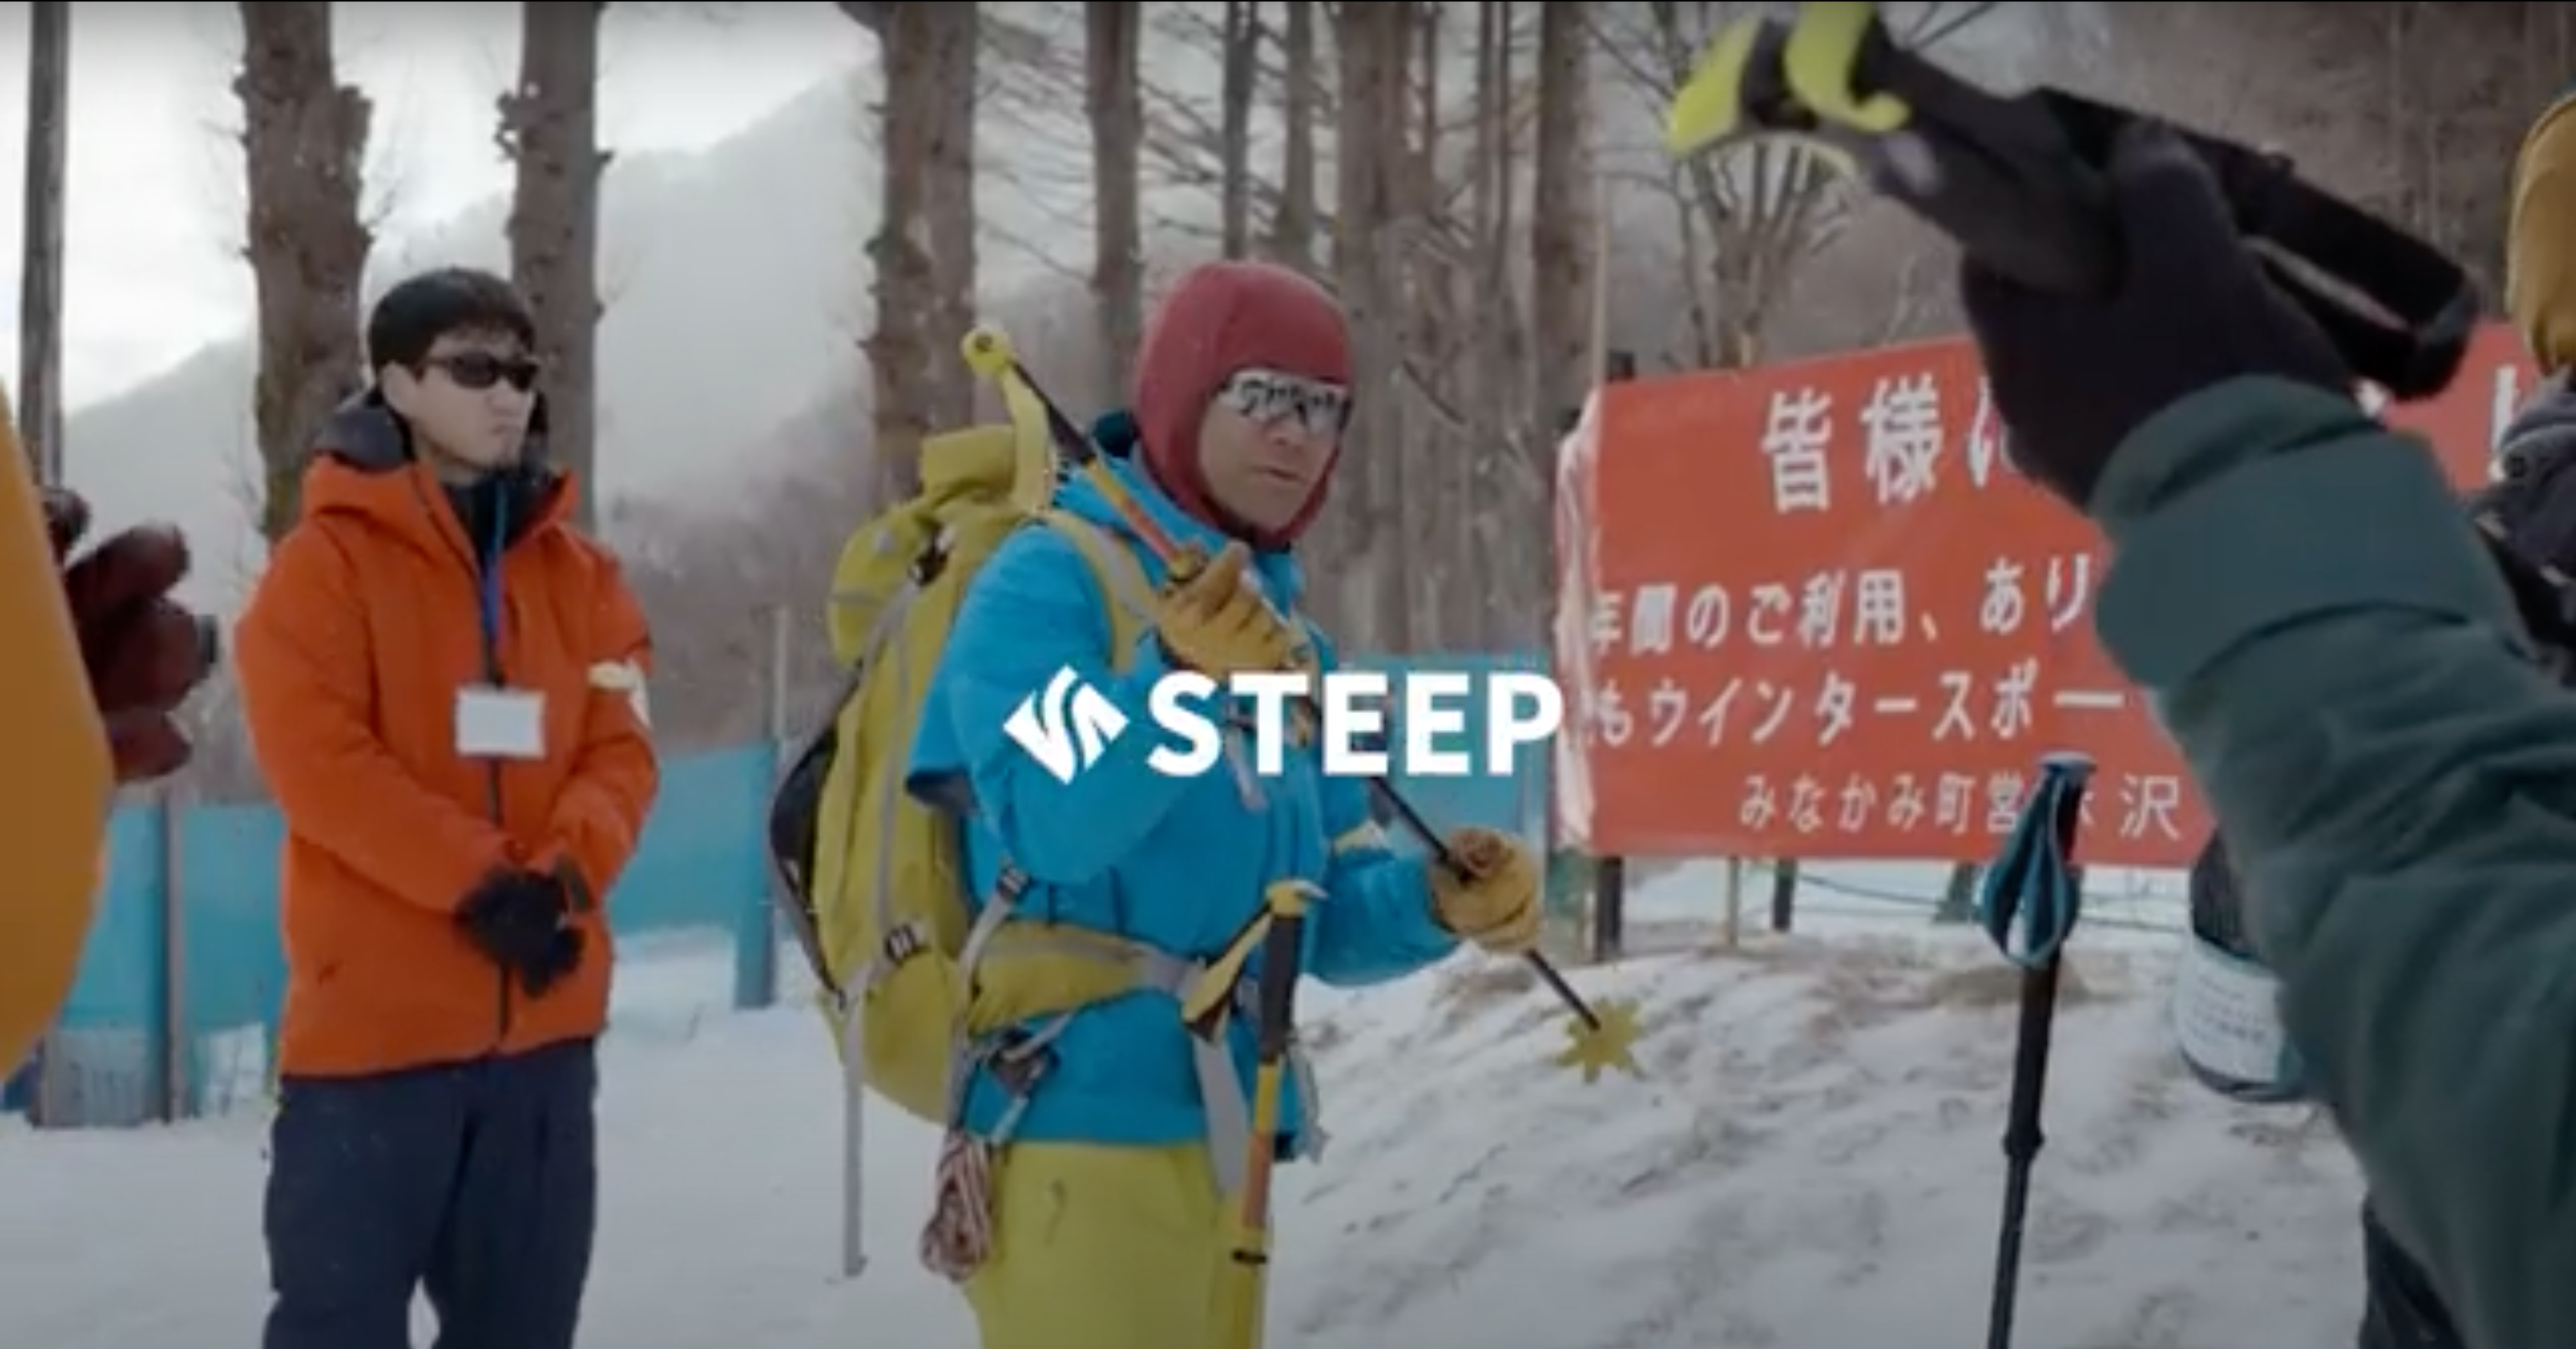
To that end, we visited the "Backcountry Ski Gear Experience" seminar, held at the end of January by Lost Arrow, a retailer of backcountry ski gear from brands like Black Diamond and Scarpa. We've compiled a collection of how-to videos for backcountry beginners, featuring excerpts from the seminar that teaches the proper use and handling of hiking gear and avalanche gear. There are a total of 10 videos.
[Hiking gear]
Climbing skins
, bindings
, ski poles
, ski crampons
, ski boots
[Avalanche Gear]
Beacon
, Shovel
, Probe
, Avalanche Backpack
This time, we
focused on ski poles. Our instructor, mountain guide Genki Narumi, gave us a lecture on ski poles. He explained the proper length and adjustment method for hiking up, as well as how to hold them in the backcountry.
Step 1: Length and grip when hiking up
*The content introduced here is only part of the training.
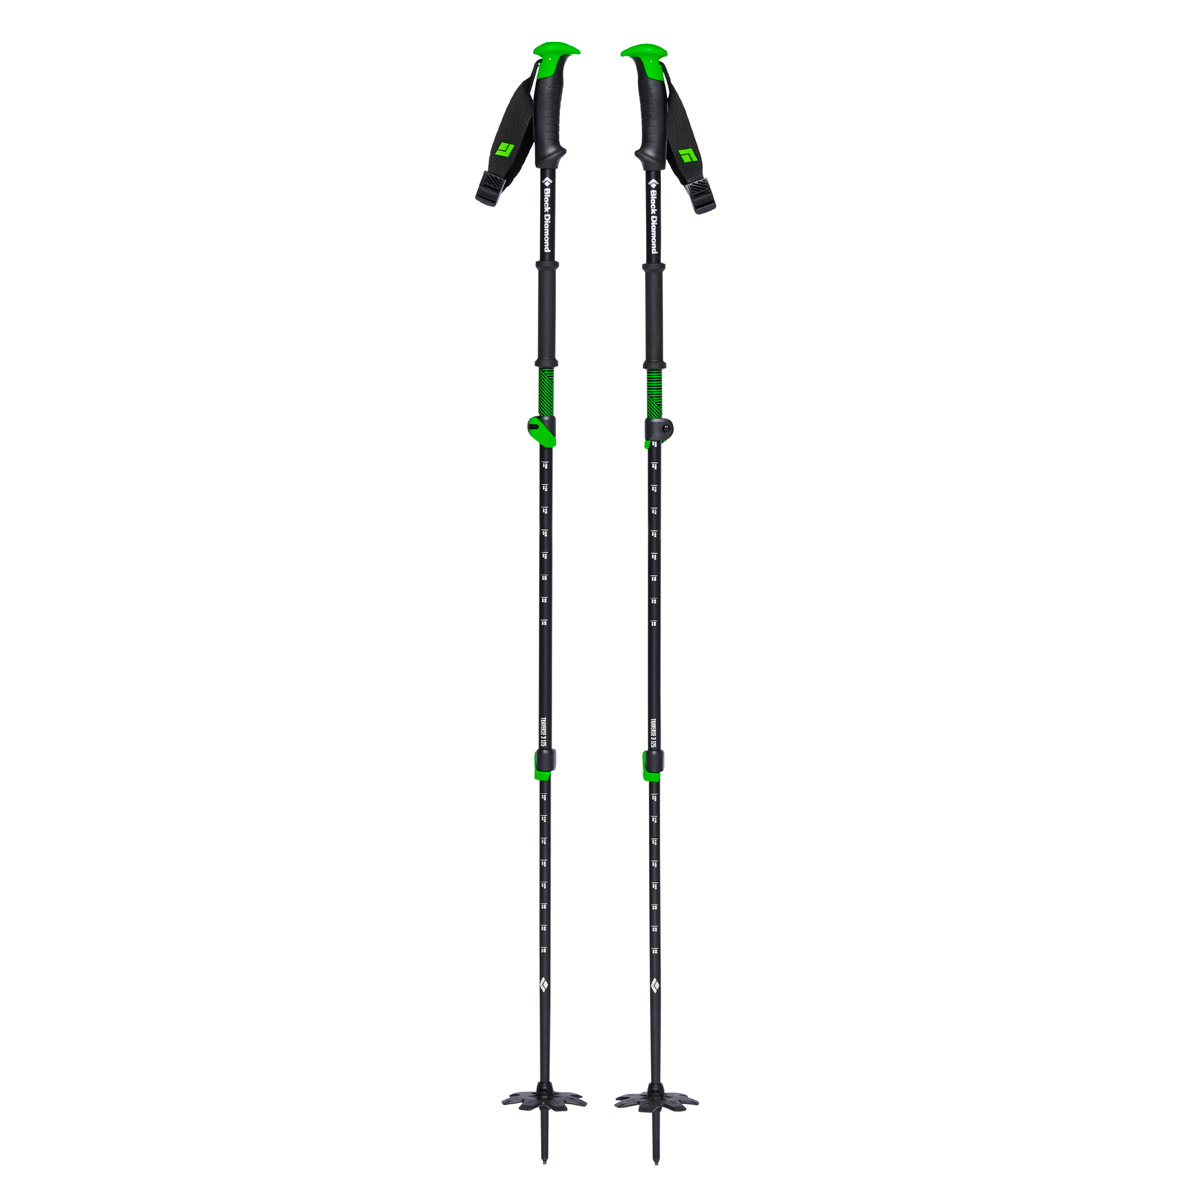
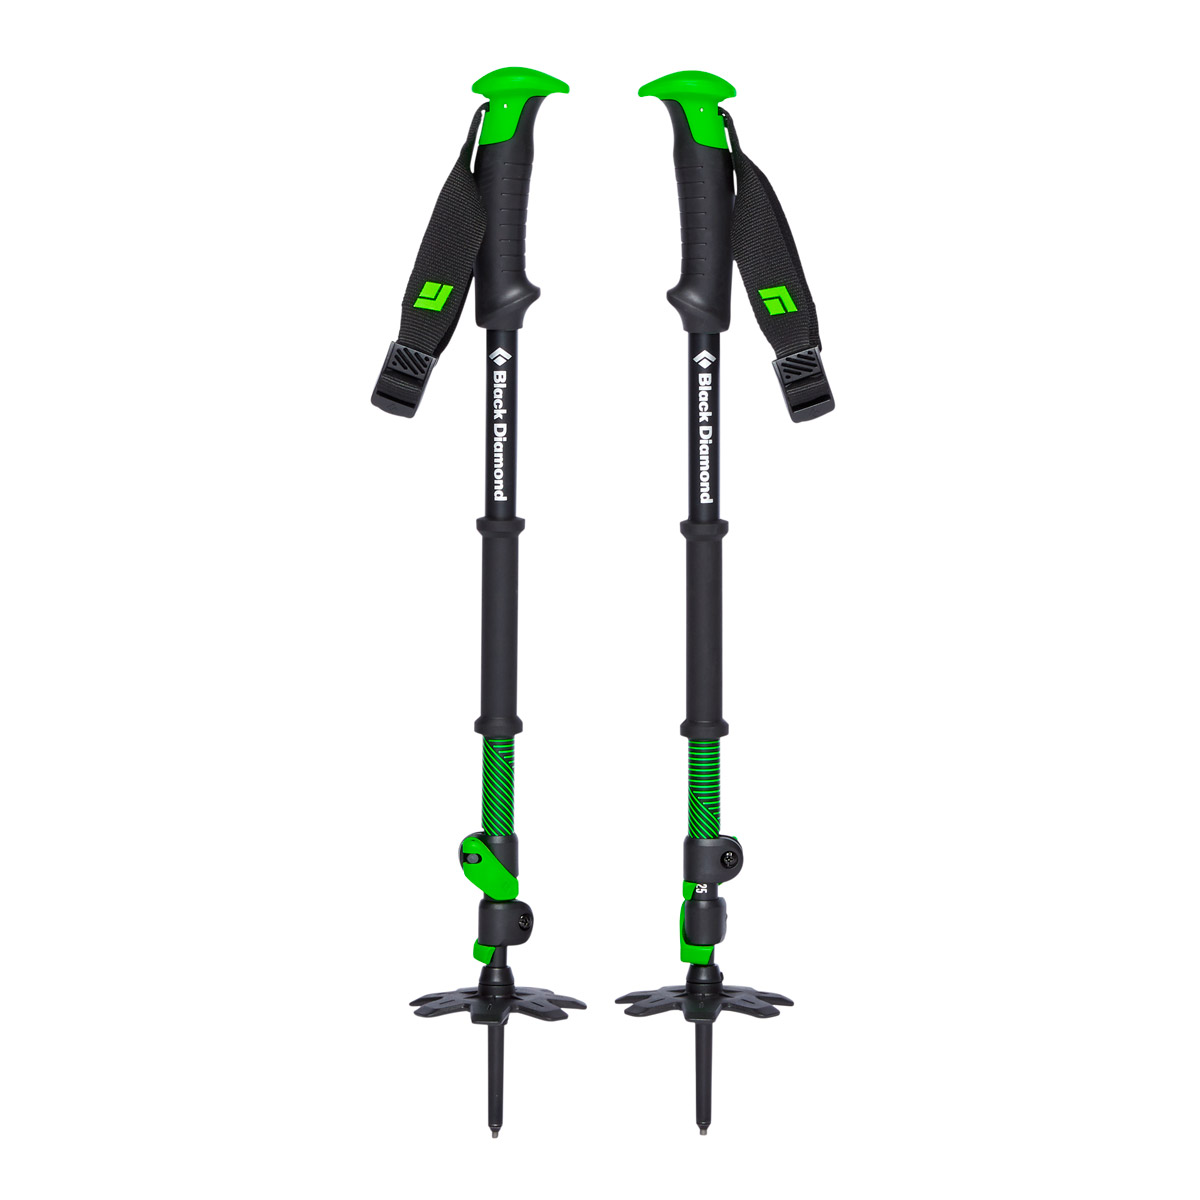
・Gear used in this video
Black Diamond Traverse 3-Pole
Introducing an aluminum traverse pole model with three adjustable positions. The top section is 18mm in diameter, the middle section is 16mm, and the bottom section is 14mm. Recommended for skiers and especially snowboarders who want a more compact design to carry. The hook-shaped grip top makes it easy to operate the buckle and heel lifter, making it a valuable addition to any hike. A rubber extension grip underneath the grip makes it easy to frequently fine-tune your grip. The length adjustment uses the proven, trusted flick lock system
Interview cooperation: Lost Arrow
Filming and editing: Daiki Yoshikawa
Video composition and text: Shinya Moriyama